Only full-time or part-time employees can participate in your plan. Any individual who is paid under contract, on a fee-for-service basis, or other arrangement (e.g., gig worker) is not eligible to participate through an employer arrangement.
If you have access to the Employer Dashboard, refer to the 'Adding employees for the first time through the Employer Dashboard'. If you do not have access, refer to the 'Adding employees for the first time through email' section.
Adding employees for the first time through the Employer Dashboard
Create Your Employer Dashboard Account
Shortly after step 1 is completed (usually within 10 business days), you will receive an email to create your Employer Dashboard Account.
Create Your Employer Dashboard Account
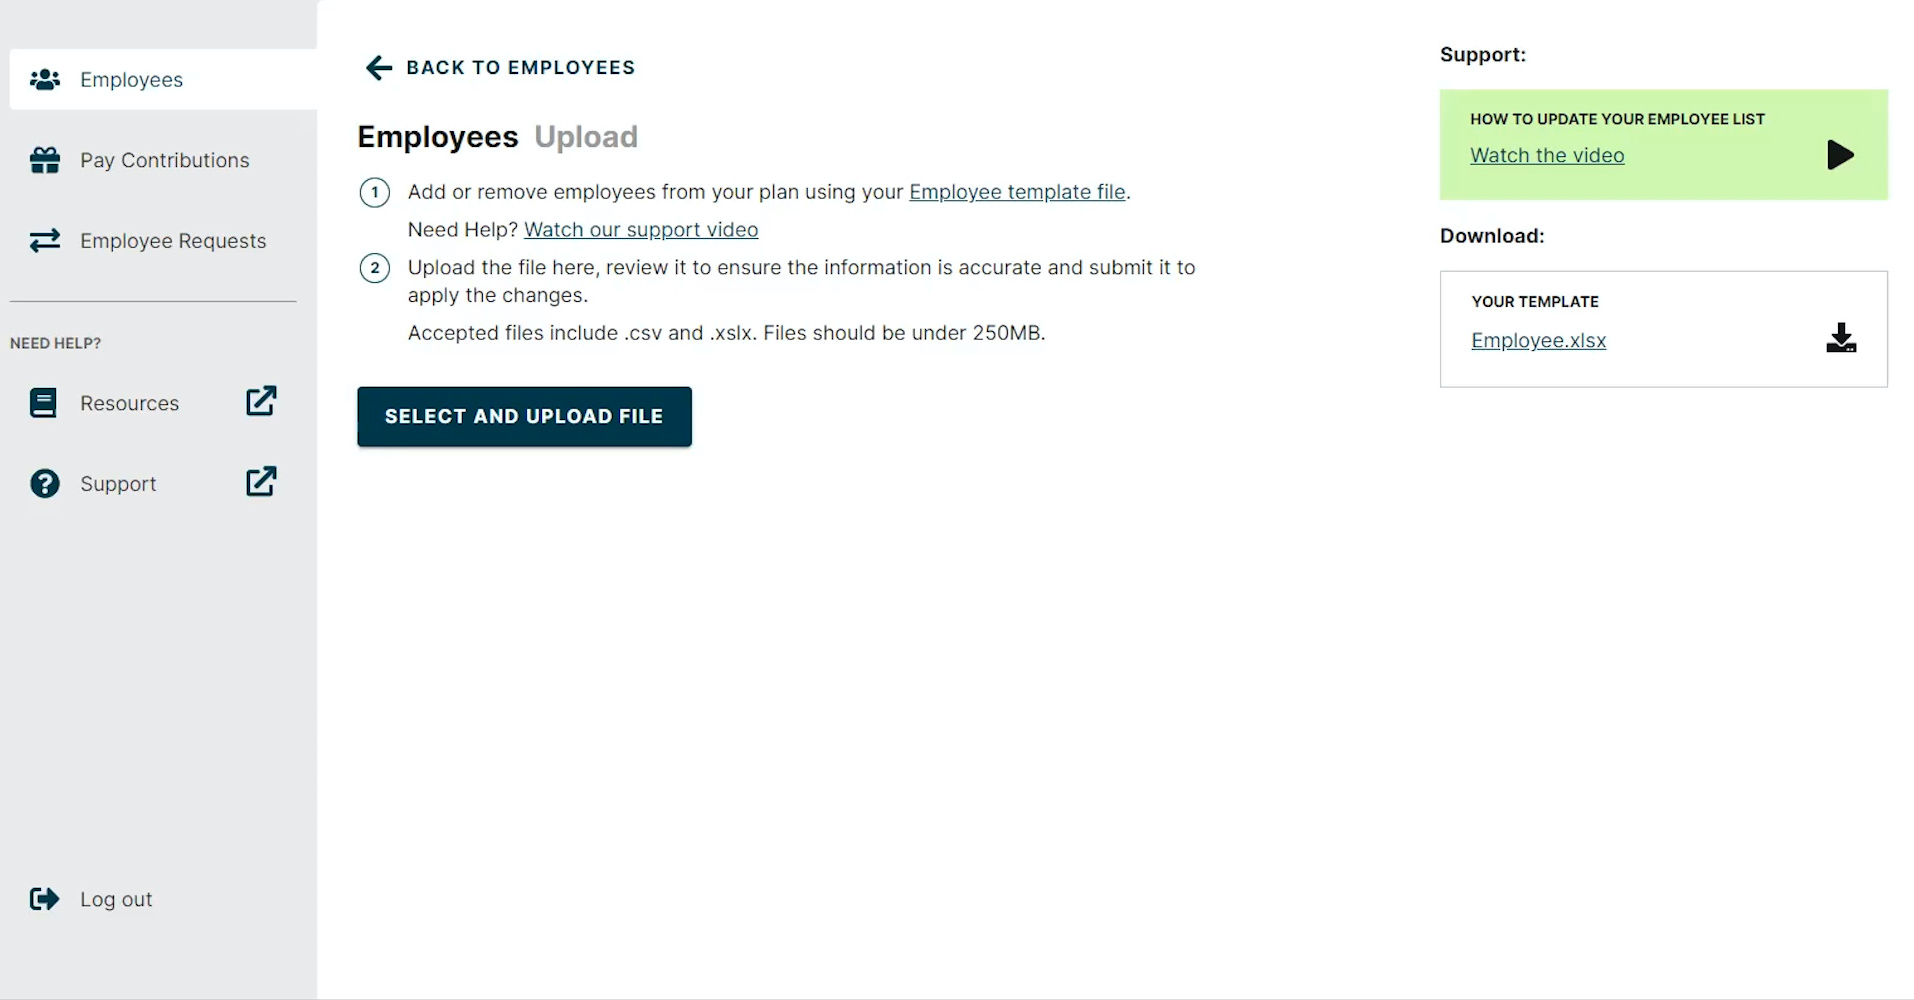
Once you have created your account, log in to the Employer Dashboard. When setting up your plan for the first time, you will see a Welcome screen that prompts you to upload an employee file.
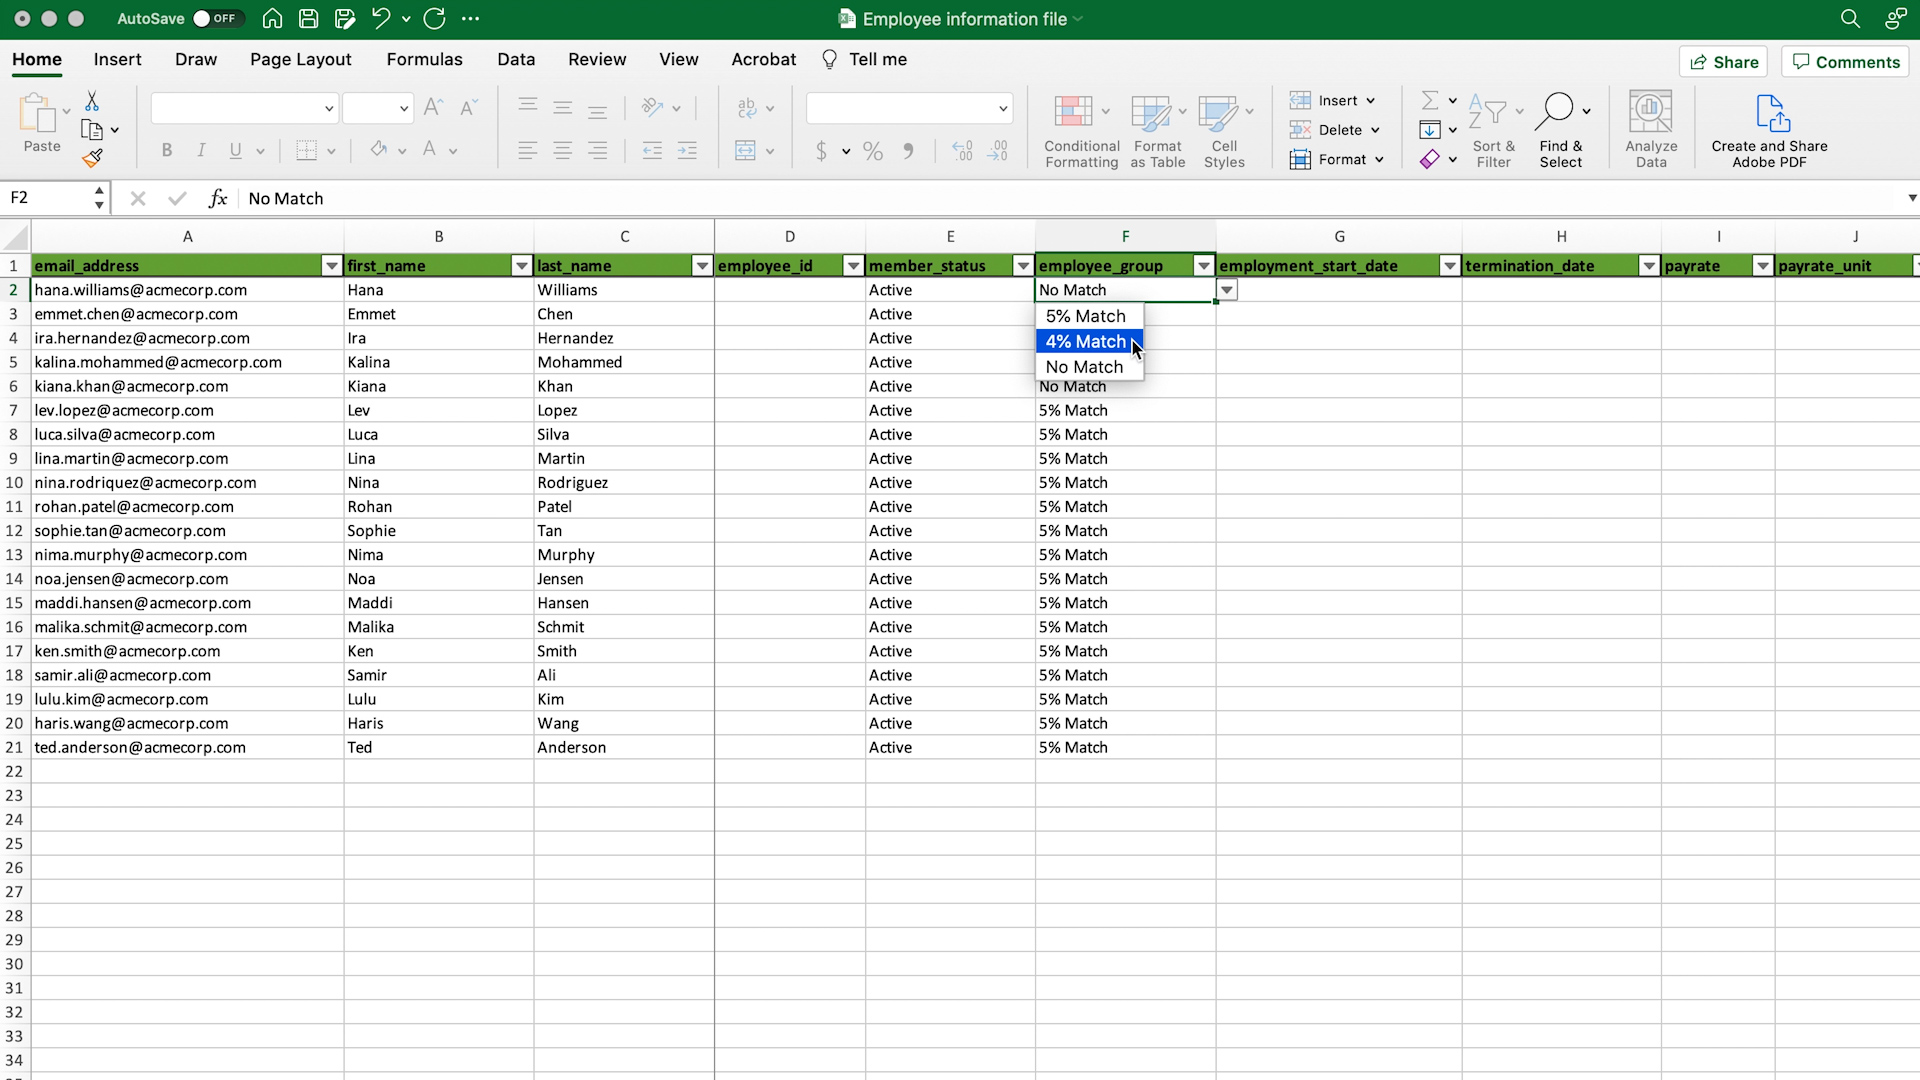
- Download and populate your employee.xlsx template file
There are a few things you'll need to include for each employee when you populate in the template:
- First and last name
- Email address
- Group (if you have groups, be sure to assign each employee to the correct group)
- Set the status to "Active"
- All other columns are optional
Completing your update
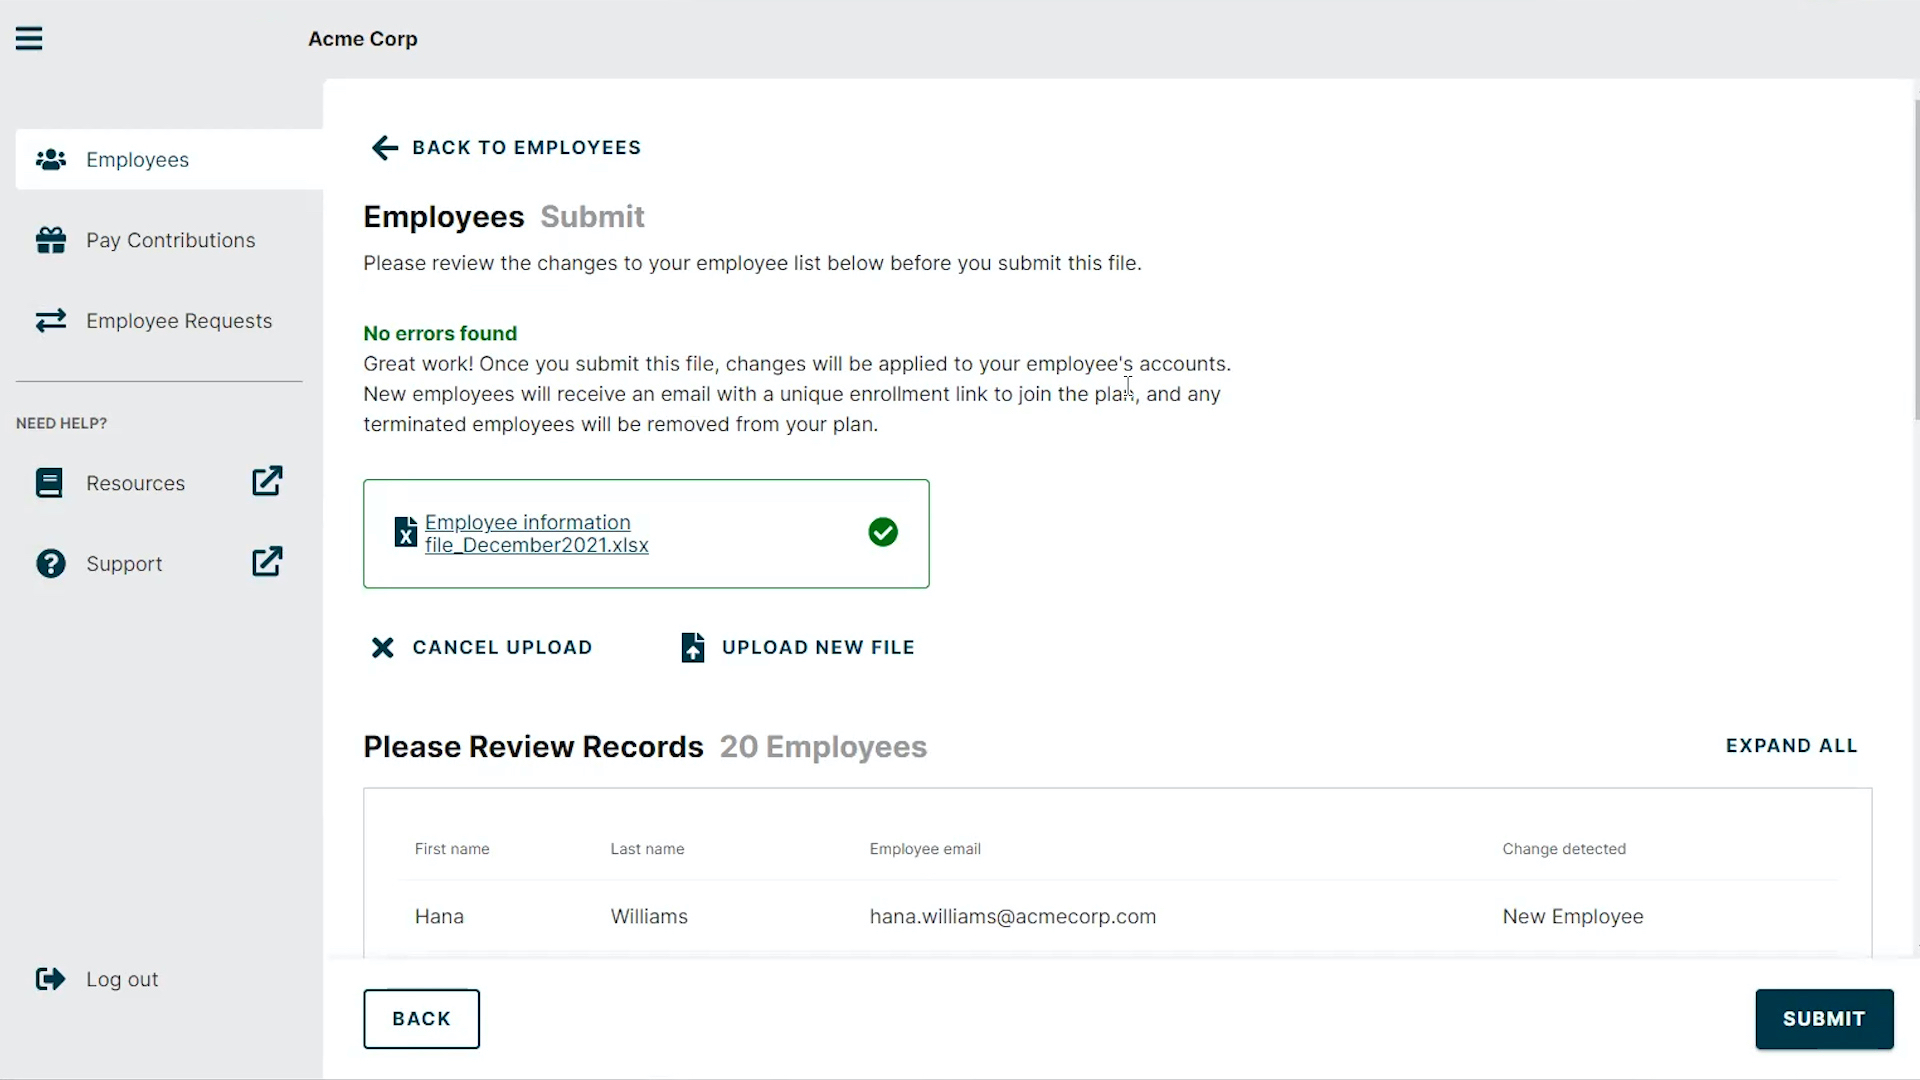
When you select and upload your file, our system will check the file content and summarize the changed records so you can review before they are submitted.
To complete your changes, click the green 'Submit’ button in the bottom right corner of the screen. Make sure that you see the ‘Success’ message before you log out.
After you update
You’ll be able to see your changes immediately when you navigate back to the Employee List. New employees will show up in the Employee List as 'New' or 'Not Enrolled' until they set their account.
Notifying new employees
An automated email will be sent to newly added employees at 4:00 pm ET that day.
Adding employees for the first time through email
If you have not received an email to create an Employer Dashboard account, populate and submit the employee.xlsx file that was emailed to you.
Employee File Dos and Don’ts
Do
- Make sure that your employees’ email addresses are formatted properly (i.e. janesmith@email.com)
- Confirm that all date fields are entered in YYYY-MM-DD format
- Make sure that your employees are assigned to the proper group (if applicable)
Don’t
- Include formulas or cell references in your file
Contact your payroll provider
This is a good time to contact your payroll provider to enable administration of RRSP, TFSA, employee deductions, and employer contributions.
Adding or removing employees after launch
To add or remove employees in the event of a new hire, temporary leave, termination, retirement or death, follow these steps.
Member data
All member data will be protected and used only for the purposes of plan administration. This includes enrollment: to verify an enrolled member is an employee of your organization and to send plan enrollment communications, employment status: to update the employment status of employees (e.g., new hire / terminated / date of change) and payroll: to track payroll details for employees (e.g., employment start date).
![]()